This is 10th post on OpenGL and Vulkan interoperability with EXT_external_objects and EXT_external_objects_fd. We’ll see the last use case I’ve written for Piglit to test the extensions implementation on various mesa drivers as part of my work for Igalia. In this test a stencil buffer is allocated and filled with a pattern by Vulkan and then it is used in OpenGL to render something else. We validate that the pattern has been imported correctly and we repeat the process for other depth-stencil formats.
vk-stencil-display test is implemented in tests/specs/ext_external_objects/vk_stencil_display.c inside Piglit.
The code is not upstream at the time of writing this blog post but it can be found in piglit merge request MR!330.
In vk-stencil-display test:
- An external Vulkan stencil buffer is used in a Vulkan renderpass and is filled with a recognizable pattern.
- Then, it gets imported into OpenGL and used to render a fullscreen quad with the stencil test enabled.
- We validate that import was successful: if so, the OpenGL quad must be masked by the stencil pattern.
- The process is repeated for different depth/stencil formats.
Step 1: An external stencil buffer is allocated and used in a Vulkan renderpass
We’ve seen how we allocate external images from Vulkan in Parts 2 and 3.
As in this test we check different depth|stencil formats, we have a subtest per format where we allocate external Vulkan images and use them in OpenGL rendering. Everything is implemented in run_subtest, which is very similar to what we’ve seen in Part 9 of these blog posts.
The images that are used in each subtests are allocated in vk_subtest_init (see code snippet below) that is called per test after we initialize some common Vulkan and OpenGL structs in piglit_init. The external allocation has already been explained in Parts 2 and 3. This step is also quite similar to the first step of Part 9 (where we had enabled the depth test in each renderer).
To use the stencil buffer in the Vulkan renderpass we need to enable the stencil test when the Vulkan renderer is created so that it gets enabled in the pipeline and renderpass. For that we set the enable_stencil value to true in vk_create_renderer.
|
1 2 3 4 5 6 7 8 9 10 11 12 13 14 15 16 17 18 19 20 21 22 23 24 25 26 27 28 29 30 31 32 33 34 35 36 37 38 39 40 41 42 43 44 45 46 47 48 49 50 51 52 53 |
static bool vk_subtest_init(int case_num) { if (!vk_fill_ext_image_props(&vk_core, w, h, d, num_samples, num_levels, num_layers, color_format, color_tiling, color_in_layout, color_end_layout, &vk_color_att.props)) { fprintf(stderr, "Unsupported color image properties.\n"); return false; } if (!vk_create_ext_image(&vk_core, &vk_color_att.props, &vk_color_att.obj)) { fprintf(stderr, "Failed to create color image.\n"); return false; } if (!vk_fill_ext_image_props(&vk_core, w, h, d, num_samples, num_levels, num_layers, depth_stencil_formats[case_num].vk_ds_fmt, depth_tiling, depth_in_layout, depth_end_layout, &vk_depth_att.props)) { fprintf(stderr, "Unsupported depth image properties.\n"); vk_destroy_ext_image(&vk_core, &vk_color_att.obj); return false; } if (!vk_create_ext_image(&vk_core, &vk_depth_att.props, &vk_depth_att.obj)) { fprintf(stderr, "Failed to create depth image.\n"); vk_destroy_ext_image(&vk_core, &vk_color_att.obj); return false; } if (!vk_create_renderer(&vk_core, vs_src, vs_sz, fs_src, fs_sz, false, true, &vk_color_att, &vk_depth_att, 0, &vk_rnd)) { fprintf(stderr, "Failed to create Vulkan renderer.\n"); vk_destroy_ext_image(&vk_core, &vk_color_att.obj); vk_destroy_ext_image(&vk_core, &vk_depth_att.obj); return false; } return true; } |
Setting enable_stencil to true when creating the renderer enables some extra settings of the Vulkan renderpass/pipeline (see tests/spec/ext_external_objects/vk.[hc]):
|
1 2 3 4 5 6 7 8 9 10 11 12 13 14 15 |
if (enable_stencil) { ds_info.stencilTestEnable = VK_TRUE; ds_info.depthTestEnable = VK_FALSE; ds_info.depthWriteEnable = VK_TRUE; } /* we only care about the passOp here */ ds_info.back.compareOp = VK_COMPARE_OP_ALWAYS; ds_info.back.failOp = VK_STENCIL_OP_REPLACE; ds_info.back.depthFailOp = VK_STENCIL_OP_REPLACE; ds_info.back.passOp = VK_STENCIL_OP_REPLACE; ds_info.back.compareMask = 0xffffffff; ds_info.back.writeMask = 0xffffffff; ds_info.back.reference = 1; ds_info.front = ds_info.back; |
What we want to achieve at the end is to fill the stencil buffer where we have rendered geometry.
And so, we need to:
- enable the stencil test to be able to write stencil values to the depth/stencil buffer:
ds_info.stencilTestEnable = VK_TRUE;. -
disable the depth test:
ds_info.depthTestEnable = VK_FALSE;(we can’t write depth and stencil values at the same time in the buffer). -
enable depth writes:
ds_info.depthWriteEnable = VK_TRUE;. In other words allow writing to the “depth” buffer which happens to be the depth/stencil buffer. The name is a bit confusing but we need to enable this setting to write stencil values.
With the rest of the settings we make sure that the stencil test runs for all pixels (VK_COMPARE_OP_ALWAYS), and when we render a pixel the stencil value in the stencil buffer gets replaced (VK_STENCIL_OP_REPLACE) with a reference value (1). Compare and write masks (0xffffffff) select the bits of the unsigned integer stencil values participating in the stencil test and the values updated by the stencil test in the framebuffer attachment. In this test we want all bits to be updated before the buffer gets imported.
We initialize the stencil buffer to 0 (check vk_draw in vk.[hc]). Let’s see how the stencil pattern is created by calling vk_draw:
The Vulkan renderpass uses the same pair of vertex and pixel shaders we’ve seen in Part 9 when we exchanged the depth buffer:
VS:
|
1 2 3 4 5 6 7 8 9 10 11 12 |
#version 430 #extension GL_ARB_separate_shader_objects : enable const vec2 vdata[] = vec2[] ( vec2(0.5, 0.5), vec2(0.5, -0.5), vec2(-0.5, 0.5), vec2(-0.5, -0.5)); void main() { gl_Position = vec4(vdata[gl_VertexIndex], 0.33, 1.0); } |
and FS:
|
1 2 3 4 5 6 7 |
#version 450 layout(location = 0) out vec4 f_color; void main() { f_color = vec4(1.0, 0.6, 0.2, 1.0); } |
We render a quad in depth 0.33 and we fill it with a random color that is not important since we aren’t going to display it. This quad we render is placed in depth 0.33, and so, it doesn’t cover the whole framebuffer. If we could display it, it would appear like a small quad in the middle of the Vulkan framebuffer. Everytime we render a pixel, the corresponding stencil value is set to 1 (see reference value above) and for pixels not being rendered keep the value 0 (which is the clear value we’ve used in the stencil configuration above).
As a result, the stencil pattern at the end of the renderpass will be a framebuffer filled with 0 everywhere and 1 in the middle. Something like this:
                     .

                     .

                     .

... 0 0 0 0 ... 0 0 0 0 ...

... 0 0 0 0 ... 0 0 0 0 ...

... 0 0 0 0 ... 0 0 0 0 ...

... 0 0 0 0 ... 0 0 0 0 ...

... 0 0 1 1 ... 1 1 0 0 ...

... 0 0 1 1 ... 1 1 0 0 ...

                         .

                         .

                         .

... 0 0 1 1 ... 1 1 0 0 ...

... 0 0 1 1 ... 1 1 0 0 ...

... 0 0 0 0 ... 0 0 0 0 ...

... 0 0 0 0 ... 0 0 0 0 ...

... 0 0 0 0 ... 0 0 0 0 ...

... 0 0 0 0 ... 0 0 0 0 ...

                     .

                     .

                     .
After it is filled we can try to import the buffer in OpenGL. Note that we used the depth attachment as there’s no separate “stencil attachment”. Depth and stencil share the same buffer and the attachment is named after the depth.
Step 2: The external stencil buffer gets imported and used by OpenGL to render something new
Importing the external stencil buffer is similar to the imports we’ve seen so far in Parts 2 and 8: we first create a memory object from Vulkan memory and then an OpenGL texture from that memory object:
|
1 2 3 4 5 6 7 8 9 10 11 12 |
if (!gl_create_mem_obj_from_vk_mem(&vk_core, &vk_depth_att.obj.mobj, &gl_mem_obj)) { fprintf(stderr, "Failed to create GL memory object from Vulkan memory.\n"); goto fail; } if (!gl_gen_tex_from_mem_obj(&vk_depth_att.props, depth_stencil_formats[case_num].gl_ds_fmt, gl_mem_obj, 0, &vkgl_stencil_tex)) { fprintf(stderr, "Failed to create GL texture from Vulkan memory object.\n"); goto fail; } |
This imported depth/stencil texture must now be used to render something with OpenGL (to validate it is correctly filled with 0 and 1. Therefore:
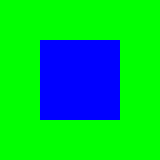
- We are going to render a blue fullscreen quad with the stencil test being enabled and using the stencil buffer as the stencil attachment to the target framebuffer.
- We are going display the result with the depth and stencil tests being disabled. We expect to see the blue quad being masked by the stencil pattern (in other words see blue pixels where the stencil values are 1 and green where they are 0).
To render with OpenGL using the Vulkan stencil buffer we need to attach it to an OpenGL FBO (that will be our OpenGL render target). We’ve created such an FBO in gl_init (called from piglit_init), and so we can call gl_subtest_init per subtest to attach each subtest’s depth/stencil image and then render a quad to the color attachment with the stencil test enabled and a stencil function that runs for all pixels and only writes them when the stencil value is one: (glStencilFunc(GL_EQUAL, 1, 0xFFFFFFFF);).
This pattern will cause the pixels that correspond to geometry to be blue (those pixels are corresponding to pixels with value 1 in the stencil buffer) and green (framebuffer color) where we haven’t rendered any geometry (which is where Vulkan let the pixels have the value they took at initialization which is the stencil buffer clear value and is 0):
|
1 2 3 4 5 6 7 8 9 10 11 12 13 14 15 16 17 18 19 20 21 22 23 24 25 26 27 28 29 30 31 32 33 34 |
static bool gl_subtest_init(void) { glBindFramebuffer(GL_FRAMEBUFFER, gl_fbo); glFramebufferTexture2D(GL_FRAMEBUFFER, GL_DEPTH_STENCIL_ATTACHMENT, GL_TEXTURE_2D, vkgl_stencil_tex, 0); glFramebufferTexture2D(GL_FRAMEBUFFER, GL_COLOR_ATTACHMENT0, GL_TEXTURE_2D, gl_color_tex, 0); if (!check_bound_fbo_status()) return false; glClearColor(0.0, 1.0, 0.0, 1.0); glClear(GL_COLOR_BUFFER_BIT); /* render a quad using the gl_color_tex and the imported * stencil buffer */ glDisable(GL_DEPTH_TEST); glEnable(GL_STENCIL_TEST); glStencilFunc(GL_EQUAL, 1, 0xFFFFFFFF); glUseProgram(gl_rnd2fbo_prog); piglit_draw_rect(-1, -1, 2, 2); glBindFramebuffer(GL_FRAMEBUFFER, 0); glUseProgram(0); glBindTexture(GL_TEXTURE_2D, 0); return glGetError() == GL_NO_ERROR; } |
After that, we must display the result of rendering with the imported stencil buffer, to validate the result and tell if the stencil import was successful.
Step 3: Validation
We map the framebuffer and we disable the depth and stencil tests. Then we map the color attachment of the OpenGL FBO to a piglit quad and we check if it contains a small blue quad inside a green quad by probing the color in a few pixel positions:
|
1 2 3 4 5 6 7 8 9 10 11 12 13 14 15 16 17 18 19 20 21 22 |
glBindFramebuffer(GL_FRAMEBUFFER, 0); glClearColor(1.0, 0.0, 0.0, 1.0); glClear(GL_COLOR_BUFFER_BIT); glDisable(GL_DEPTH_TEST); glDisable(GL_STENCIL_TEST); glUseProgram(gl_prog); glBindTexture(GL_TEXTURE_2D, gl_color_tex); piglit_draw_rect_tex(-1, -1, 2, 2, 0, 0, 1, 1); assert(glGetError() == GL_NO_ERROR); if (!piglit_probe_pixel_rgb(w / 2, h / 2, blue)) goto fail; if (!piglit_probe_pixel_rgb(0, 0, green) || !piglit_probe_pixel_rgb(piglit_width - 1, 0, green) || !piglit_probe_pixel_rgb(0, piglit_height - 1, green) || !piglit_probe_pixel_rgb(piglit_width - 1, piglit_height - 1, green)) goto fail; piglit_present_results(); |
And that’s it. If the drivers had correctly exported and imported the stencil attachment, piglit_present_results will display the green/blue pattern from the beginning of this post.
To sum up:
In this test we’ve seen how to reuse an external Vulkan stencil buffer from OpenGL. I’ve used a Piglit test I’ve written to check our EXT_external_objects and EXT_external_objects_fd extensions implementations in various Mesa3D drivers as an example.
Next:
That was the final EXT_external_objects(_fd) use case I’ve written for Piglit to test different mesa drivers implementations of the feature and there won’t be a follow-up example unless we see that we need to write more tests. But I might blog post about the updated status of the Mesa3d drivers implementations at some point in this category, as most of our WIP and under review branches I’ve mentioned in my XDC presentation are now upstream.
Links:
- [1] EXT_external_objects specification
- [2] EXT_external_objects_fd specification
- [3] Previous posts on interoperability:
- [OpenGL and Vulkan Interoperability on Linux] Part 1: Introduction
- [OpenGL and Vulkan Interoperability on Linux] Part 2: Using OpenGL to draw on Vulkan textures.
- [OpenGL and Vulkan Interoperability on Linux] Part 3: Using OpenGL to display Vulkan allocated textures.
- [OpenGL and Vulkan Interoperability on Linux] Part 4: Using OpenGL to overwrite Vulkan allocated textures.
- [OpenGL and Vulkan Interoperability on Linux] Part 5: A Vulkan pixel buffer is reused by OpenGL
- [OpenGL and Vulkan Interoperability on Linux] Part 6: About overwriting buffers
- [OpenGL and Vulkan Interoperability on Linux] Part 7: Reusing a Vulkan vertex buffer from OpenGL
- [OpenGL and Vulkan Interoperability on Linux] Part 8: Using a Vulkan vertex buffer from OpenGL and then from Vulkan
- [OpenGL and Vulkan Interoperability on Linux]: The XDC 2020 presentation
- [OpenGL and Vulkan Interoperability on Linux] Part 9: Reusing a Vulkan z buffer from OpenGL
See you next time!
