Vulkan conformance tests for graphics drivers save their output images inside an XML file called TestResults.qpa. As binary outputs aren’t allowed, these output images (that would be saved as PNG otherwise) are encoded to text using Base64 and the result is printed between <Image></Image> XML tags. This is a problem sometimes, as external tools are required to display them. In this post I’d like to share a few simple hacks I’m using to instantly display the CTS output image when I’m running a CTS test, hoping that they might be handy to more people who work on the drivers.
Let’s see how a random CTS test output is like:
A random CTS test output image in TestResults.qpa would look like text inside Image tags:
|
1 2 3 4 5 6 7 8 9 |
<Image Name="Result" Width="31" Height="48" Format="RGBA8888" CompressionMode="PNG" Description="Result (p' = p * (1, 1, 1, 1) + (0, 0, 0, 0))"> iVBORw0KGgoAAAANSUhEUgAAAB8AAAAwCAYAAADpVKHaAAAA7klEQVRYhe3WSw7D IAwEUMKVmjPRM9Ez5U7JomJRgvHYJqBK7rKFeZOIT7dXymdY9ImrYDN+fN5r8AJb CqjwGtQWEOMUpCkgwjlAWgDG0WBJAQiXPhE6nsW1iwmZ18Wt+5ibT+JWGMlp4qNg Lu+Gj4Z7uZEb8GSBSP0wo0CcCdcFtjME/zPhuOOOO+6443+O7ykvgfeUv08+u0Dx Yv3FLPgHn1Ggzr8tuKcKtHKbq310ASqP3GqjCvRyuvvcWoCbzx4y2gLIPOiEkxZA x8PHKxooKSo627lg6RsSXywUoFkbqluthrSLUn2lFtCyHS+pMlzBC+tJ+gAAAABJ RU5ErkJggg== </Image> |
This text can be decoded to PNG and be something like the following image (I selected a random test here from a branch I had just modified):
![]()
A user needs to decode himself the text to PNG to view the output images.
CTS tools and why I am not always using them:
Users can use external tools written to display the CTS output or can manually call base64 -d on the image contents.
The most broadly used tools to display the CTS tests outputs are: Cherry (written by Google), Piglit and LoadQpa (written by my colleagues Eduardo Lima Mitev and Ricardo Garcia, who published a blog post on his work on the tool here).
Unfortunately, none of these tools can immediately display the output image of a test after the test is running. To see the output with Piglit, the test must be ran from inside Piglit. To use Cherry users must setup and run a go server (and maybe a web server too IIRC). Then the tests can be ran from a self-hosted web page using a browser. LoadQpa is much faster and easier to use as it doesn’t require any special setup but it still requires a browser and the user must paste the contents of TestResults.qpa in a web form to display the output images of one or more tests. Besides, LoadQpa doesn’t print any information about the displayed images, and it’s hard to tell which output image corresponds to which test when TestResults.qpa contains many tests results. This is not a problem when we need to take a quick look at many tests output but it can be quite confusing when we need to debug some particular group of tests that generate similar output images.
In this case for example:
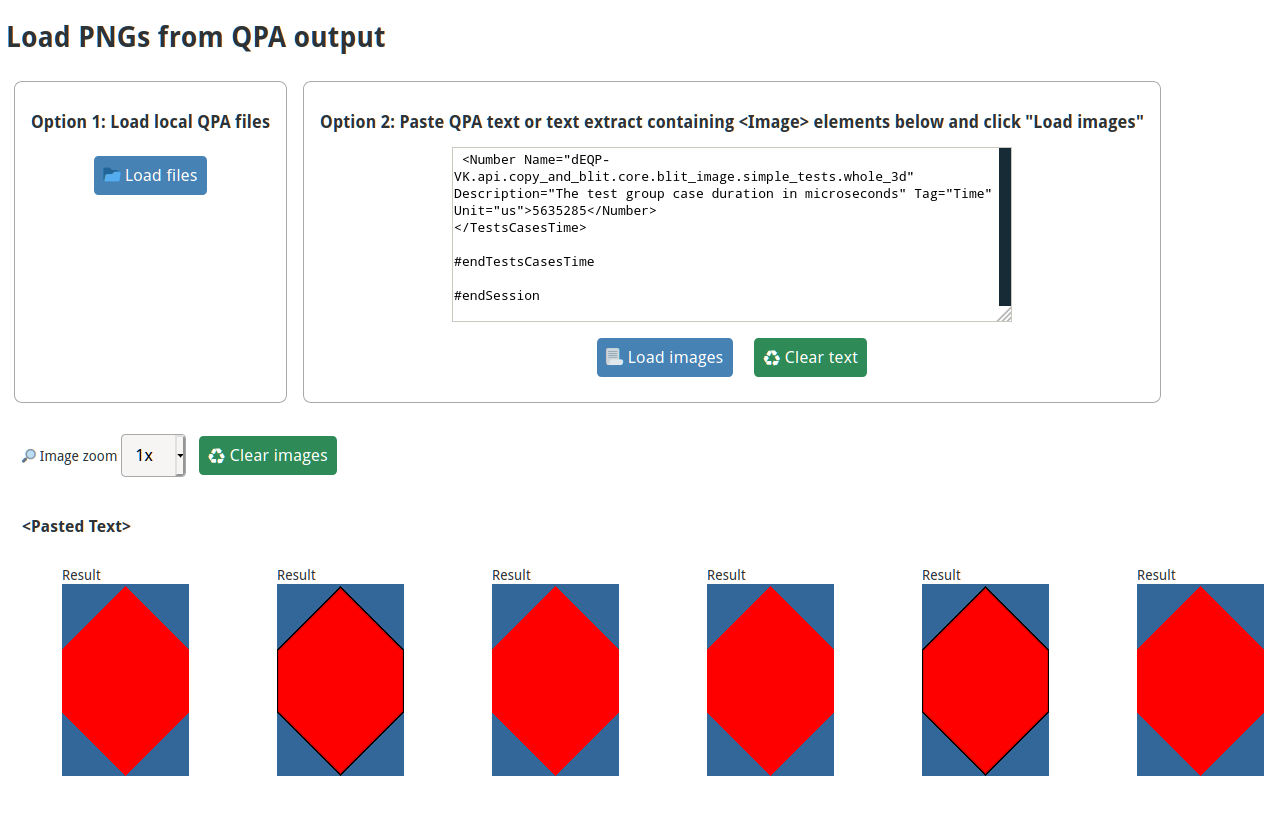
I’ve pasted the TestResults.qpa‘s contents into the form after having ran a group of 6 CTS tests that all blit images with a similar method. It was hard to tell which output corresponded to which test without any additional information printed by the browser.
My setup to display the output image immediately after running a test:
As I wanted to debug either one test at a time or very small groups of tests, I was looking for a very minimal tool that could help me to run them and immediately see the result image on screen as if the test was rendering on a window or save the images with a unique name (eg <test_name>.png) so that I can examine them later with a simple thumb/image viewer.
Because what I needed wasn’t so sophisticated to require a CTS specific software, I’ve just written two scripts using Perl and ImageMagick. My solution isn’t perfect either but it’s a quick hack I can use to see the output as if the test was rendering its output on a window without depending on a test-suite program (case of Piglit), a web server (case of Cherry) or the browser (case of LoadQPA), and without having to decode the image manually (base64 -d).
The first script can display the output image of one single test from its TestResults.qpa (run_cts.pl) and the second can repeatedly run the first for a group of tests (run_mustpass_selection.pl).
Before I used the scripts, I made sure both of them are executable:
|
1 2 |
chmod +x run_cts.pl chmod +x run_mustpass_selection.pl |
and I symlinked them to my $HOME/bin directory:
|
1 2 3 |
cd $HOME/bin ln -s <path>/run_cts.pl run_cts ln -s <path>/run_mustpass_selection.pl mustpass_selection |
After that I could run the first as:
|
1 |
run_cts -d <dir> -t <testname> |
where:
diris thedeqp-vkdirectory, for examplecheckout_dir/build/external/vulkancts/modules/vulkan- and
test_namethe full name of the test as it appears in mustpass (vk-default.txt) for example:dEQP-VK.api.copy_and_blit.core.blit_image.simple_tests.whole_3d.b8g8r8a8_unorm_linear
This is convenient when I need to rebuild and run a test many times to examine how the output changes, as:
- the output image is displayed immediately (see the example gif below).
- the output image is saved inside a “
png/” directory inside the directory ofdeqp-vkfor future use.

The second script was useful when I needed to select and run a group of tests and save their output images with unique filenames. It can be ran as:
|
1 |
run_mustpass_selection -f <file> -d <dir> |
where file is a file that contains a list of test names taken from mustpass and -d the deqp-vk directory.
The output is a png image per test saved inside the <deqp-vk_dir>/png/ directory named as <test_name_as_it_appears_in_mustpass>.png.
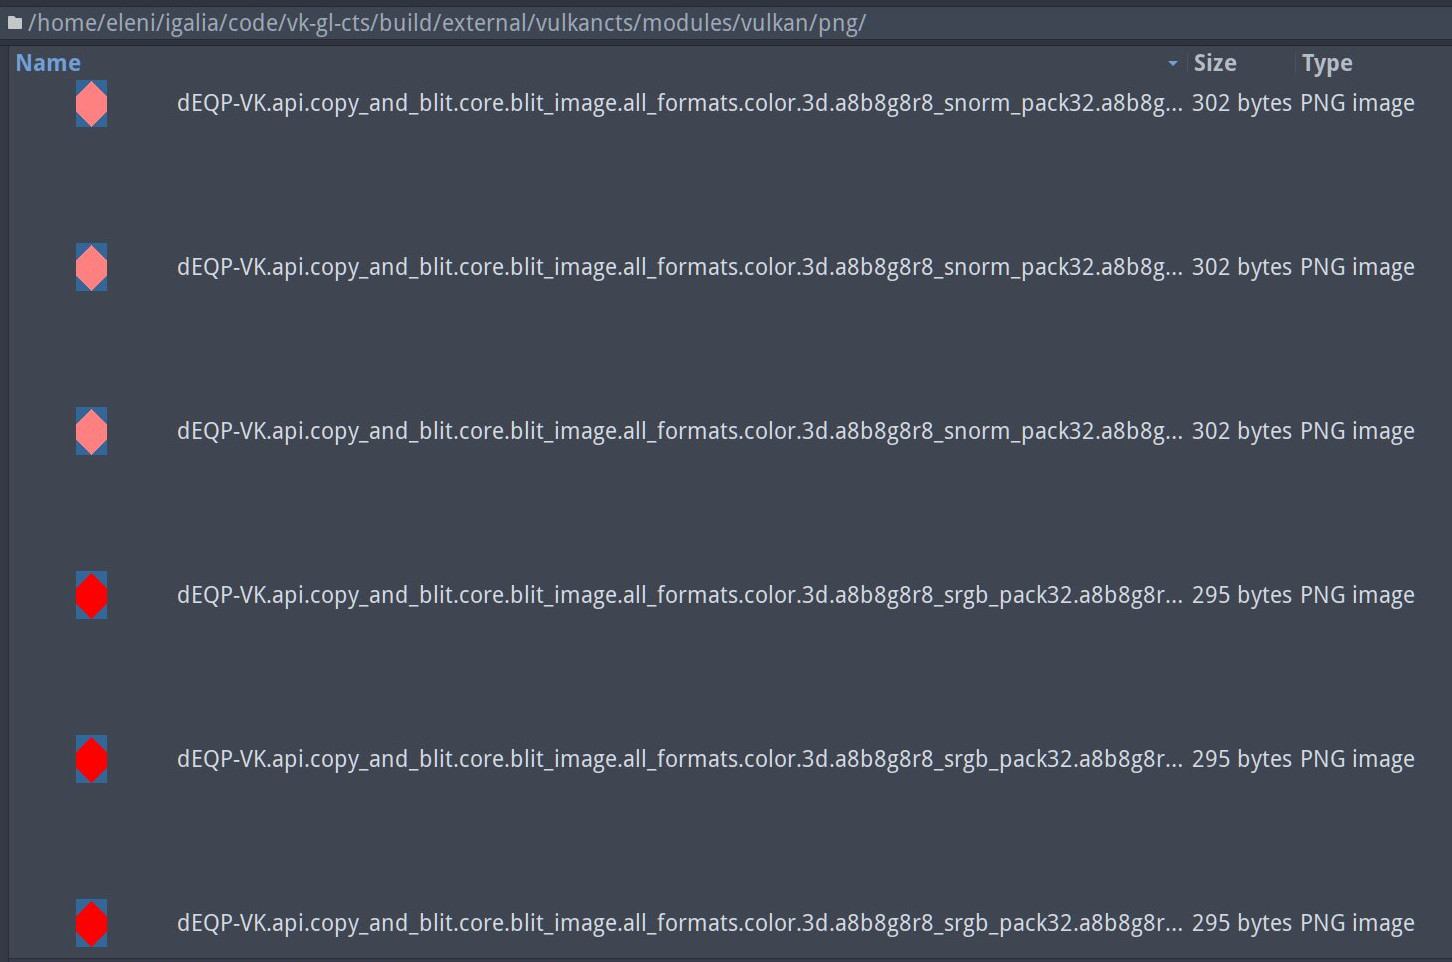
I can take a quick look using any offline viewer that can display thumbs or display the one that corresponds to the test’s of interest filename.
Here’s an example where the 2nd test could be handy:
Suppose that we’d like to check all the outputs of tests that blit images, are 3D, and use linear interpolation. We could do something like:
|
1 2 |
cat external/vulkancts/mustpass/master/vk-default.txt | grep -i copy_and_blit\.core.*blit.*3d.*linear > /tmp/selected_tests run_mustpass_selection -d $HOME/igalia/code/vk-gl-cts/build/external/vulkancts/modules/vulkan -f /tmp/selected_tests |
Directory $HOME/igalia/code/vk-gl-cts/build/external/vulkancts/modules/vulkan (the script takes the fullpath) contains all the matching tests PNG images inside a new png/ directory and one can still check TestResults.qpa to see the results.
Closing,
I hope that the first script can be useful to CTS developers who need to display their output images without using a browser or a server. These scripts are not a replacement for the other tools I’ve mentioned before, they are just an extra “help” for when someone needs to modify and debug a test output very often during development.
UPDATE!
I’ve updated the scripts a few times after this blog post and I might re-modify them to add new options. So, if you want to use them make sure you check help first by running:
|
1 2 |
run_cts -h run_mustpass_selection -h |
to see the new options.
Links:
[1]: run_cts: https://gist.github.com/hikiko/f8bb564b90b530b0d8ebaa4688ede063
[2]: run_mustpass_selection: https://gist.github.com/hikiko/28b844bf85e31bc7bcaa9bdc51230450
[3]: LoadQpa: https://rg3.name/202006071359.html
See you next time!
![]()