In the previous post of these series, I tried to explain the nearest depth algorithm [1] that I used to improve Iago Toral‘s SSAO upscaling in the sponza demo of VKDF. Although the nearest depth was improving the ambient occlusion in higher resolutions the results were not very good, so I decided to try more quality improvements. In this post, I am going to talk about my first experiments on improving the Z-buffer downsampling.
Remember that improving the quality of the upscale with a depth aware algorithm involves two parts:
- Improving the depth buffer downsampling
- Improving the texture upsampling using the depth information
So, I started with the first part:
We have already seen that this z-buffer downsampling is performed in a separate Vulkan pass before calculating the ambient occlusion factor. The pass takes as input the original Z-buffer and uses the fragment shader to scale it to the SSAO texture resolution. So every attempt to improve the downsampling takes place in this fragment shader.
We have also seen a comparison between the combination of max depth/nearest depth upsampling and the linear interpolation upsampling, and the conclusion was that both methods cause many artifacts in lower resolutions, but max depth seems to improve significantly the AO in the curves and where we have depth discontinuities. The final result was not spectacular though.
At this point, I needed to check if other downsampling methods could give me better depth values and if that change alone could be enough to improve the nearest depth upsampling. By “better values” here, I mean more representative of the values of the original depth buffer.
Most articles I’ve read suggest to take the minimum or the maximum depth in a 2×2 neighborhood. The advantage of the minimum is that you can have the nearest depth (nearest to the observer). But the maximum depth seems to work better with the depth discontinuities. As I had already tried the maximum, I gave a try to the minimum too.
In the following videos taken in the 1/2 (target) resolution we compare:
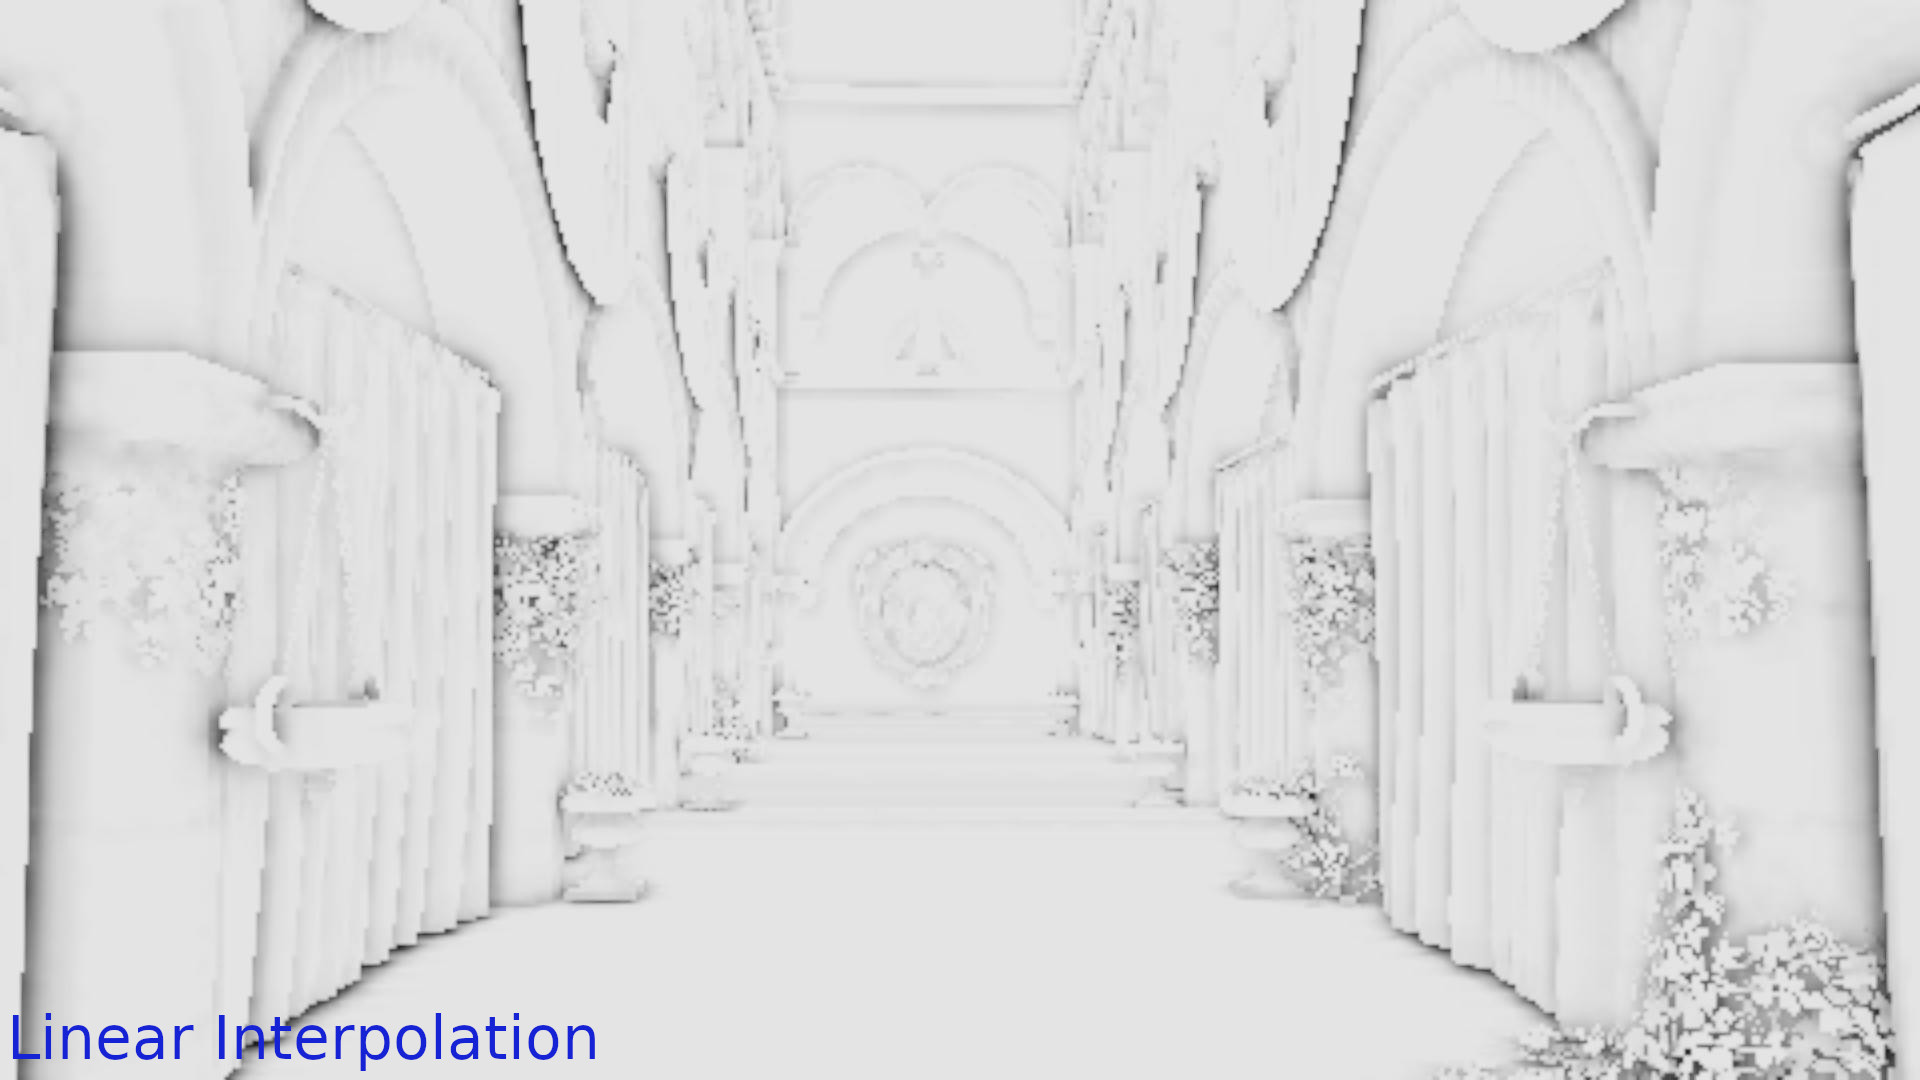
Linear interpolation vs taking the maximum depth in the 2×2 neighborhood and performing nearest depth:
Linear interpolation vs taking the minimum depth in the 2×2 neighborhood and performing nearest depth:
Note: I use screenshots taken in lower resolutions in order to make the artifacts more visible but all the videos are taken in 1/2 resolution that is our target resolution (in case I forget to mention it later).
I think that it is obvious that the maximum is reducing more the artifacts where we have depth discontinuities (not all samples of the neighborhood lie in the same surface) so it is more suitable for this demo.
But was there any other option?
This article here, that is about some rendering techniques used in Call of Duty Black Ops 3, suggests another interesting z-buffer downsampling optimization:
Downsampling the z-buffer by taking once the maximum once the minimum depth following a checkerboard pattern
According to the post, taking only the minimum or only the maximum depth on each neighborhood increases the probability to discard valuable information. The author sampled the z-buffer by taking once the minimum and once the maximum depth following a checkerboard pattern and achieved better results. This makes sense as the checkerboard pattern reduces the probability of rejecting valuable information as in each 2×2 neighborhood of the low resolution texture we will have 2 samples near the camera and 2 samples far from it and so the new neighborhoods will be more representative of the original surface than neighborhoods that only have the maximum or the minimum values of the original.
So, I’ve also implemented the checkerboard.
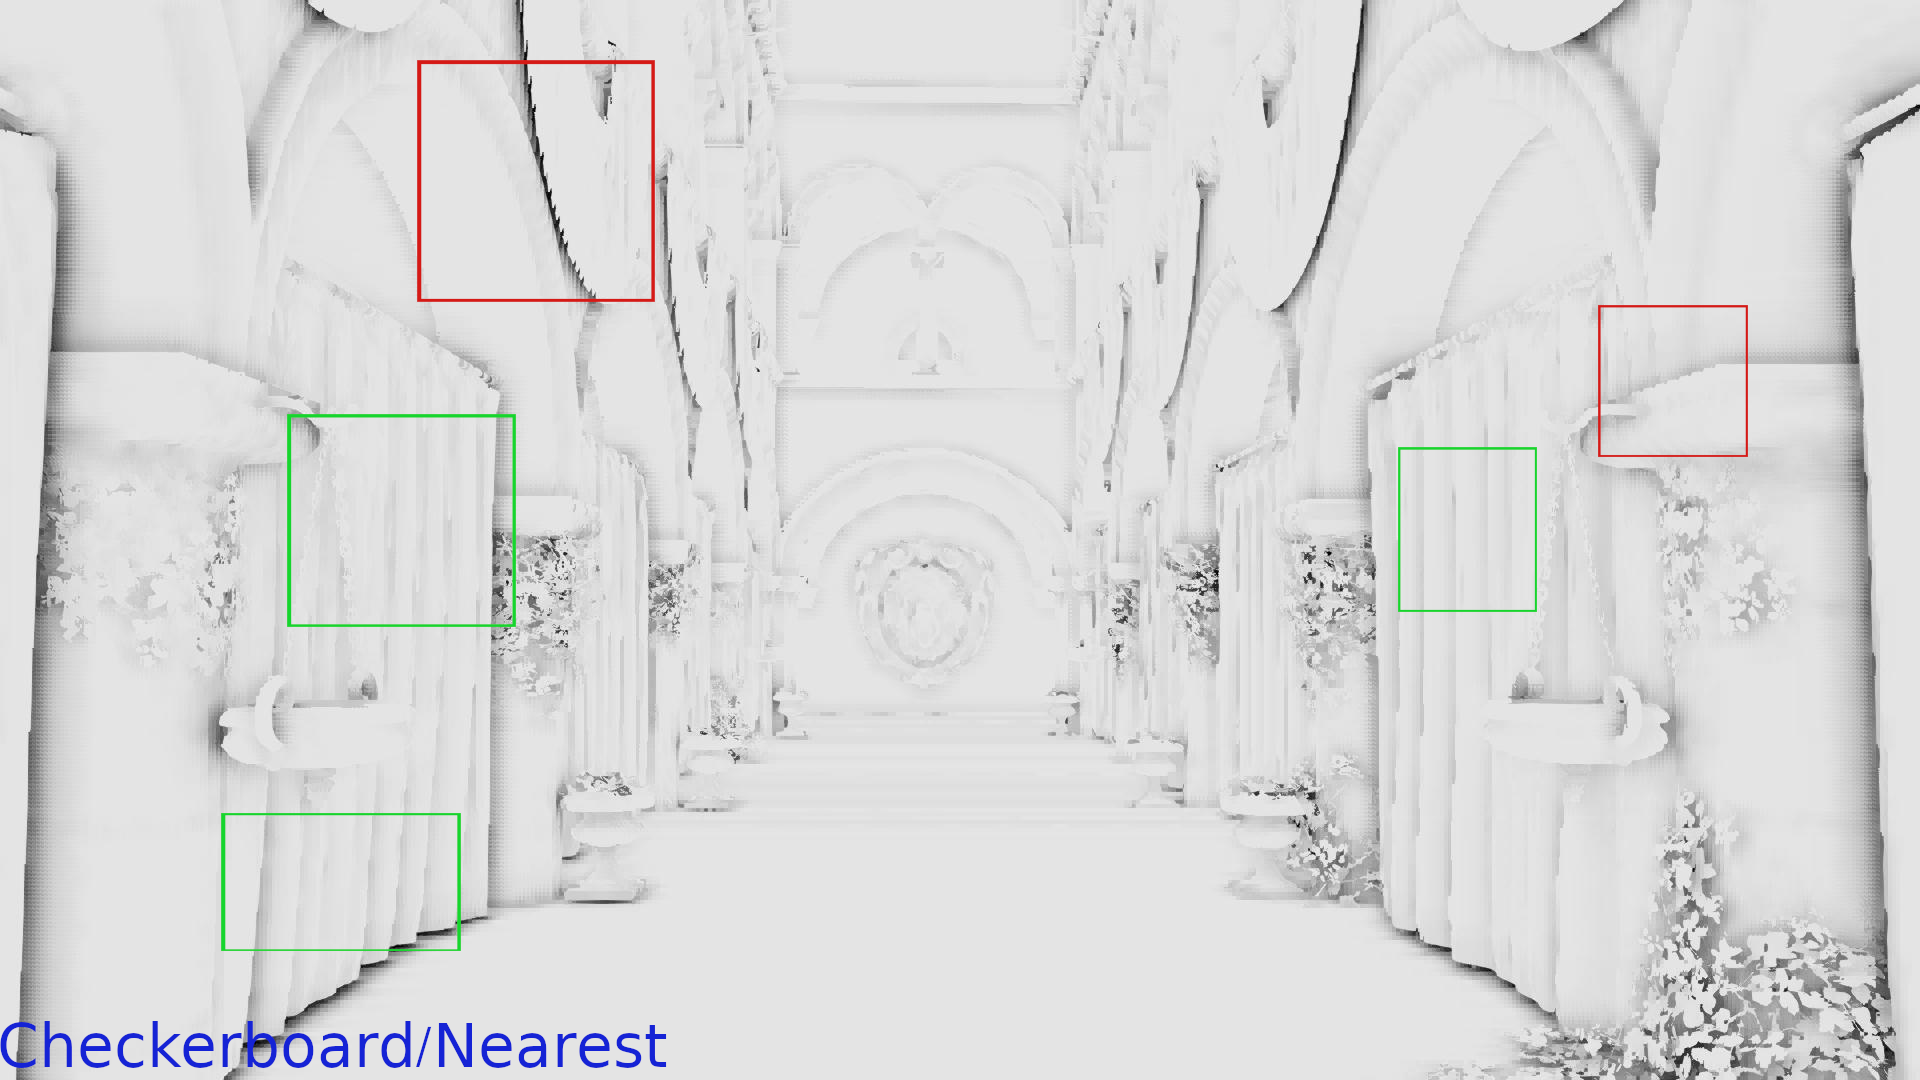
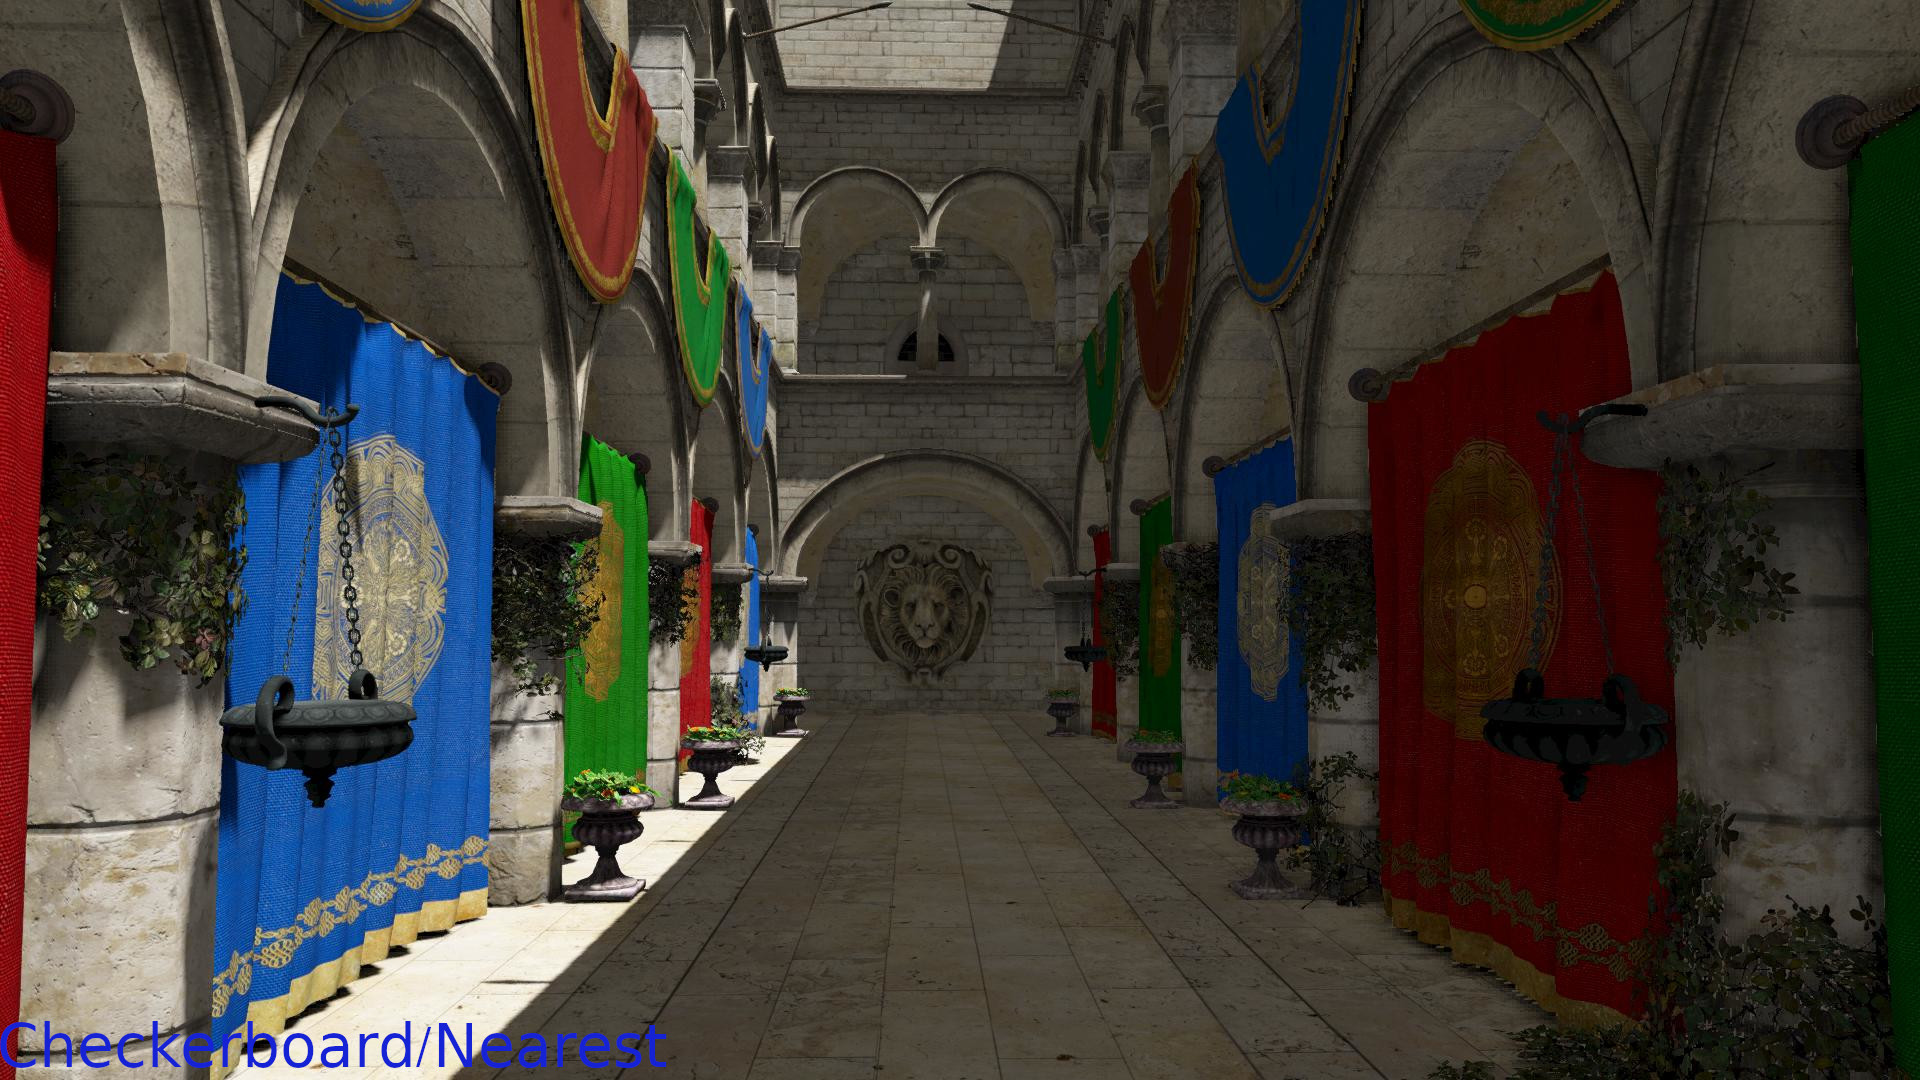
Comparisons in 1/4 of the original resolution
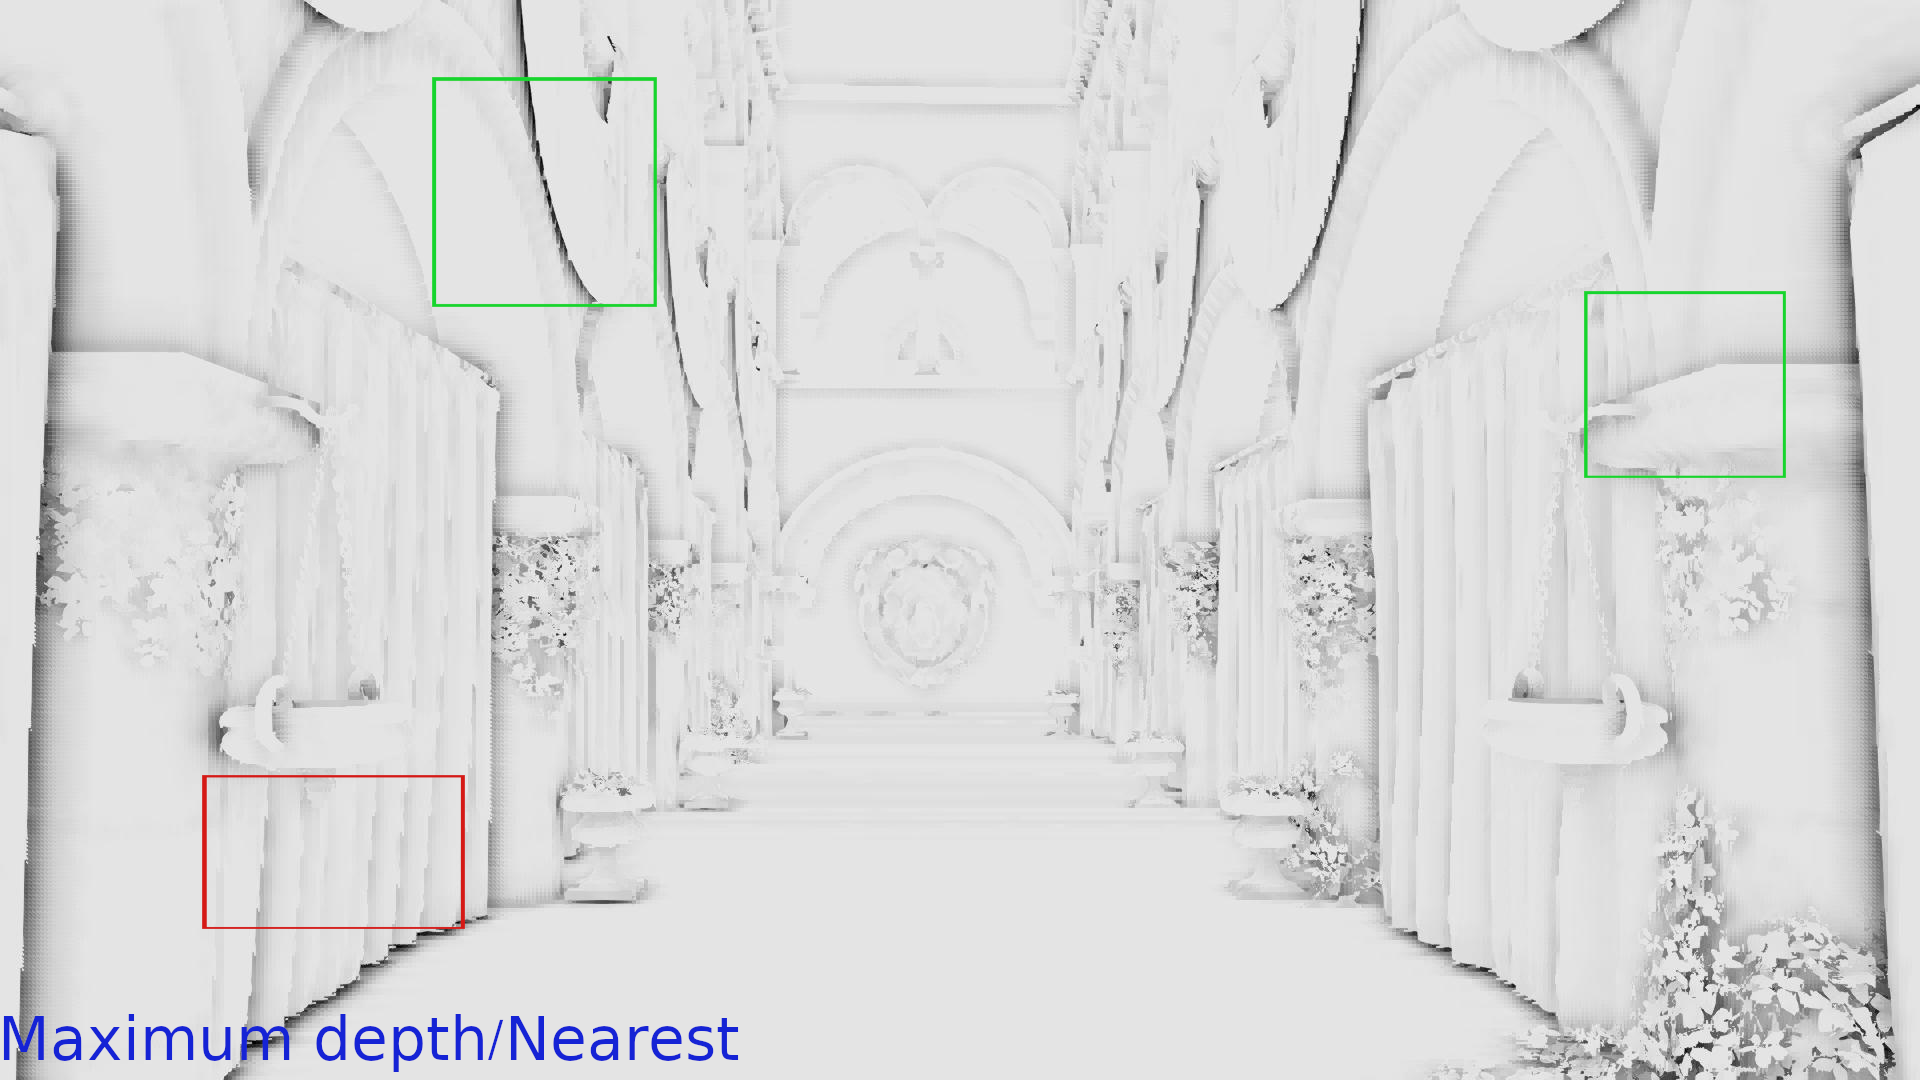


Linear Interpolation vs Maximum Depth/Nearest Depth:
Linear Interpolation vs Checkerboard/Nearest Depth:
Checkerboard/Nearest Depth vs Max Depth/Nearest Depth:
The checkerboard seems to improve the quality in some surfaces (see the curtain on the left) but it’s very similar to the maximum depth and in surfaces with many depth discontinuities seems to give much worse quality than the maximum depth (see the columns on the right).
So at this point I was quite confused about the methods and decided to display them side by side for a better overall comparison. Let’s see the videos, this time in the target (1/2) resolution:
Linear Interpolation vs Max depth/Nearest depth:
Linear Interpolation vs Checkerboard/Nearest Depth:
Max Depth/Nearest Depth vs Checkerboard/Nearest Depth:
Conclusions:
It is obvious that the nearest depth with both downsampling methods has an advantage where we see discontinuities compared to the linear interpolation. But apart from that it’s hard to select a downsampling method as the “best”. Both checkerboard and max depth cause artifacts in some surfaces and work well in some others and although checkerboard has an advantage, this is not as clear as one would expect.
Another interesting observation though is that despite that lerp causes more artifacts in the edges and the corners and anywhere else we might have depth discontinuities, it seems to work well in the big flat surfaces. This can be explained by the fact that lerp is a form of weighted average of the neighborhood colors which generates a more smooth color appearance when many samples fall in the same surface. This observation is mentioned in the Call of Duty related article [3] and gave me the idea of some upsampling algorithms that I will explain in Part 3 of these series.
Time for some code:
I’ve already demonstrated how to take the maximum depth. So let’s see how I’ve implemented the checkerboard method:
In order to create a checkerboard pattern one must mark the even pixels of the even rows and the odd pixels of the odd rows with the same value (number, color, whatever). This involves a lot of checks and I had already used many “if”, “switch” statements in the shaders. Ideally, I’d like to avoid more checks during the marking.
It seems that the following function can do exactly that:
|
1 2 3 4 5 |
float checkerboard(in vec2 uv) { vec2 pos = floor(uv); return mod(pos.x + mod(pos.y, 2.0), 2.0); } |
Here’s a checkerboard.shader_test for vkrunner/piglit if you need to test this quickly.
It generates the following pattern by returning once 0 and once 1 (I had to use the magnifier to show it as each square is 1 pixel size):

Using this pattern to select the maximum or the minimum depth in each 2×2 neighborhood of the original z-buffer is then easy:
|
1 2 3 4 5 6 7 8 9 10 11 12 13 14 15 16 17 18 19 |
layout(location = 0) in vec2 in_uv; layout(set = 0, binding = 0) uniform sampler2D tex_depth; void main() { float d1 = textureOffset(tex_depth, in_uv, ivec2(0, 0)).x; float d2 = textureOffset(tex_depth, in_uv, ivec2(0, 1)).x; float d3 = textureOffset(tex_depth, in_uv, ivec2(1, 1)).x; float d4 = textureOffset(tex_depth, in_uv, ivec2(1, 0)).x; /* * we select once the minimum once the maximum depth * following a checkerboard pattern: */ gl_FragDepth = mix(max(max(d1, d2), max(d3, d4)), min(min(d1, d2), min(d3, d4)), checkerboard(in_uv)); } |
The other steps were the same I mentioned in my previous post. The downscaled z-buffer was used in the AO calculation and where I performed nearest depth upsampling instead of linear interpolation.
To sum up:
So far, we’ve seen the following methods of upscaling a half resolution texture to its original size:
- Linear interpolation:
It causes a lot of artifacts but it has an advantage on large surfaces as the weighted average results in smoother colors. - Depth aware techniques:
- Maximum depth/Nearest depth combination:
It is better than the lerp in the curves, but the overall result is not significantly better. - Minimum depth/Nearest depth combination:
Better than lerp worse than maximum depth/nearest depth combination. - Checkerboard selection of min and max/Nearest depth combination:
Significantly improves the AO where we have depth discontinuities. It doesn’t seem to improve the AO in large surfaces. In some points it’s worse than maximum depth so although its output is more representative of the original surface, so we could maybe replace it by the maximum if we need to simplify the downsampling later (we will do more comparisons in the follow up posts).
- Maximum depth/Nearest depth combination:
We compared the last 3 methods that could probably improve the downsampling part and we saw that the checkerboard and the max depth have an advantage compared to linear interpolation or minimum depth alone but they still give unacceptable artifacts when not combined with other algorithms.
In the next post, we will analyze some ways to improve the upsampling part of the SSAO texture upscaling and see if combining the upsampling improvements with these downsampling methods can reduce the artifacts. I also plan to write a follow up post as while writing these blog posts I found more interesting methods to combine with the discussed.
All the algorithms of this post in a playlist and in 1920×1080 resolution for those who want to check them. Again the SSAO scale is 1/2 of the original one (960×540):
To be continued…
[1]: http://developer.download.nvidia.com/assets/gamedev/files/sdk/11/OpacityMappingSDKWhitePaper.pdf
[2]: https://blogs.igalia.com/itoral/2018/04/17/frame-analysis-of-a-rendering-of-the-sponza-model/
[3]: http://c0de517e.blogspot.com/2016/02/downsampled-effects-with-depth-aware.html